Building a house is a grind. You start out thrilled. Then you’re stuck in decision fatigue, staring at samples of cabinetry and tile until your eyes glaze over. It’s easy to let the mundane details crush the excitement. But there is one category you cannot afford to ignore. Energy efficient home features.
Most builders push you toward the basic package. They want to keep margins high. Ignoring efficiency is a mistake. It’s not just about being green. It’s about lowering your monthly bills. It’s about increasing your home’s resale value. And frankly, it’s about not wasting money on utility bills that could have been avoided.
You don’t need to go full off-grid. You just need to make smart choices. Adding these upgrades might cost a bit more upfront. You’ll pay for the hardware and the labor. But the math usually works out. Lower energy costs offset the initial investment. You save cash. You conserve resources. You make a house that actually makes sense to live in.
Here are ten ways to green your new build. We’ll look at the pros. We’ll look at the cons. You decide what fits your budget and your lifestyle.
10. Programmable Thermostats
It starts with the brain of your HVAC system. A programmable thermostat is the most basic entry point for energy savings. If you’re still using a dial thermostat from the 90s, you’re throwing money away.
How does it work? You set it to lower the heat (or raise the AC) when no one is home. Then you set it to comfort levels when you wake up or get home. Simple logic.
The Pros
– Immediate reduction in heating and cooling loads.
– No behavior change required from you. Once you set the schedule, it runs itself.
– Cheap. You can buy a basic model for under $30. Advanced Wi-Fi models run $100-$200.
The Cons
– You have to program it. If you forget, it does nothing.
– Basic models are annoying to adjust. You’re waking up at 3 AM because you want it warmer? You have to climb out of bed to change the dial.
– Smart versions require a Wi-Fi connection and an app. If you’re not tech-savvy, the setup can be frustrating.
“A programmable thermostat pays for itself in one heating season in most climates.”
For a new build, get a hardwired unit. Avoid battery-powered ones if you can. They die at the worst times. If your builder includes a basic programmable thermostat, take it. Upgrade later to a smart one if you want remote access. But start with something that at least respects your schedule.
Smart Thermostats: Automating Your Savings
Heating and cooling usually eat up half your utility bill. The fastest fix? Stop fighting the dial and start programming it. Most utility providers agree on the baseline: keep it at 68 degrees in winter, 78 in summer. Let the device handle the shift. Your HVAC system only fires up when the air hits those thresholds. No manual tweaking. No forgetting to adjust it before bed.
You can shave another 3 to 5 percent off those bills for every degree you push away from those baselines. Go lower in winter. Go higher in summer. It adds up.
The real magic lies in matching the schedule to your life. A 5-1-1 thermostat lets you set separate programs for weekdays, Saturday, and Sunday. Need more flexibility? A 5-2 model splits the week into weekday and weekend routines. If your work-from-home days are chaotic, grab a seven-day unit. It costs as little as $40. You set it once. It runs forever.
LED and CFL Lighting: The Switch-Up
Incandescent bulbs are dying. Good. They waste energy and money. Switching to Compact Fluorescent Lamps (CFLs) or Light Emitting Diodes (LEDs) is one of the cheapest green upgrades you can make.
CFLs cost about $2 more than traditional bulbs. Over their lifespan, they save you more than $60 compared to a 100-watt incandescent. They last longer. They run cooler. But they aren’t for everyone. Some people find the light harsh. It doesn’t flatter skin tones or warm up a room the way old bulbs did. Plus, they contain trace amounts of mercury. You have to recycle them properly. That’s a hassle for some homeowners.
If the light quality bothers you, look at LEDs. Philips dropped an LED bulb designed to replace the standard 60-watt incandescent. It uses 80 percent less energy. It lasts 25 times longer. The color temperature mimics incandescent light closely. No mercury. No special disposal rules.
If you are building new, do it now. Install all LEDs at once. Your eyes get used to one color temperature. Change one type later, and the shift feels jarring. Stick with one palette. It’s easier on the brain.
Low-Flow Plumbing: Water Conservation
Water bills climb. Fixtures are the leak in the bucket. Faucets. Showerheads. Toilets. Toilets are the biggest culprit, using about 26 percent of home water.
The old standard was 3.5 gallons per flush (gpf). The new industry norm is 1.6 gpf. That’s a solid start. But if you are installing in a new build, don’t stop there. High-efficiency models run at 1.28 gpf. That saves roughly 3,000 gallons per toilet, per year.
The complaint is always the same: less water means more cleaning. Manufacturers heard this. They’ve added features like American Standard’s EverClean surface. It’s silver-based. It inhibits bacteria, mold, and mildew. The bowl stays cleaner longer. You scrub less.
High-efficiency toilets can carry a premium price tag. Check last year’s models. They often drop in price. You get the tech without the new-release markup.
ENERGY STAR Appliances: The Label Matters
You’ve seen the blue label. It’s everywhere. ENERGY STAR is a government program started to cut greenhouse gas emissions. The EPA sets the criteria. Appliances that meet them earn the mark. They use 10 to 50 percent less energy and water. Performance doesn’t drop.
Here’s the kicker: they often cost the same as inefficient models. The EPA requires that any price premium be recouped through utility savings within a “reasonable period.” For many appliances, that period is short. You aren’t paying extra for green. You’re paying for efficiency that pays you back.
Check the specs. Look for the label. It’s an easy filter for good value.
Let’s be blunt: swapping out existing windows is rarely a smart financial move for a homeowner. The upfront cost is steep, and the actual drop in your energy bill? A modest 7 to 15 percent. It’s rarely enough to justify the labor and material expense unless you’re replacing broken panes.
But the math flips completely if you’re breaking ground on a new build.
The New Build Advantage
When you specify energy-efficient windows during construction, the economics work. The additional cost per window is usually just $15 over a generic unit. That tiny premium is easily absorbed by the long-term energy savings. You aren’t paying a fortune for green tech; you’re just making a slightly smarter choice before the drywall goes up.
If you aren’t building from scratch and still want to upgrade, you need to look past the marketing gloss. Two numbers matter more than any brand name or color swatch.
Decoding the Numbers
You need to understand U-factor and Solar Heat Gain Coefficient (SHGC). These sound like physics terms, but they are simple metrics for your wallet and comfort.
- U-factor measures thermal transmission. It tells you how well the window prevents heat from escaping in winter.
- SHGC measures solar heat gain. It tells you how much heat from the sun enters your home in summer.
Here is the trick: lower is better for both. A low U-factor means your heat stays inside. A low SHGC means your AC doesn’t have to fight against the sun.
“The lower the rating for each, the more energy efficient your window will be.”
If those acronyms are making your head spin, you aren’t alone. Fortunately, ENERGY STAR has simplified the landscape. They don’t just slap a label on random products. They certify windows based on specific climate zones.
Why Climate Zones Matter
You wouldn’t wear a winter coat in Miami. You shouldn’t buy winter windows for a house in Phoenix. ENERGY STAR breaks down recommendations by geographic region.
- Northern Zone: Prioritize low U-factor. You need to keep heat in.
- Southern Zone: Prioritize low SHGC. You need to keep heat out.
- Northern/Central Transition: You need a balance of both.
Look for the label. It’s the quickest way to filter out products that claim to be “eco-friendly” but perform poorly in your specific weather pattern.
The Price Trap
One final reality check on cost. ENERGY STAR certified windows should sit at the same price point as standard models. If a “green” window costs twice as much, run. The whole point is that the efficiency gains offset the modest upfront cost, often within a few years. If the sticker shock is real, the payback period will be years longer than your mortgage.
Sustainable Materials
Once the glass is sorted, the frame and surrounding structure demand attention. Wood rot, vinyl degradation, and fiberglass brittleness are all real risks. Choosing materials that last reduces the need for replacement, which is the ultimate sustainability hack.
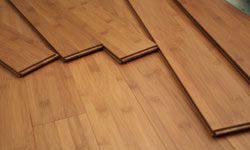
You are building something new. That means every detail is yours to dictate. If protecting the planet matters to you, let that guide your choices. You do not have to sacrifice style for sustainability. Beautiful floors and counters can come from earth-friendly sources.
Choosing Sustainable Flooring Materials
Bamboo stands out as a top contender. It is a rapidly renewable resource. This makes it a genuinely green choice for your floors. Some homeowners hesitate. The natural color might not match their vision. Look at woven bamboo instead. It stains in richer, more complex colors. It mimics the grain of traditional wood more closely. It is also significantly harder. That means it lasts longer. Durability matters in high-traffic areas. And surprisingly, the price point is often quite affordable. It offers style, strength, and a lower environmental footprint all at once.
Recycled Glass Countertops as a Granite Alternative
Granite feels luxurious. It is not renewable, however. Recycled glass surfaces offer a different path. Vetrazzo is one popular option. It embeds flecks of recycled glass into a matrix. You can choose from a variety of colors. The result is a bold statement piece for your kitchen.
The cost is higher than standard laminate. But is it more than granite? Often, no. The price point is comparable. Sustainability wins here. As green building materials gain market share, prices tend to drop. Large home improvement stores already stock these products. This accessibility makes switching easier than you might think.
There are other options too. The market is expanding. Talk to your contractor. Visit your local hardware store. Ask for experts. They can point you toward materials that fit your budget and your values.
Upgrading HVAC Systems for Efficiency
Heating and cooling drain your wallet. The average cost exceeds $1,000 annually. That is a lot of money wasted if your system is inefficient. An ENERGY STAR-rated HVAC system can boost efficiency by 9 percent. This seems small. But over time, the savings add up.
However, buying the best unit is only half the battle. Poor installation negates those gains. Even the most efficient system will fail if installed incorrectly. This is where ENERGY STAR’s Quality Installation (QI) guidelines come in. They provide a checklist for pros. Proper sizing is critical. An oversized or undersized unit struggles to maintain temperature. It wastes energy. A QI-compliant installation can cut energy costs by up to 30 percent compared to non-QI jobs.
Zoning is another lever to pull. Divide your home into multiple zones. You need separate thermostats for each. This requires more than one HVAC system. It might seem like an extra cost upfront. But in larger homes, it makes sense. You heat and cool only the rooms you are using. You do not waste energy on an empty guest bedroom. Control is granular. Comfort is higher. Bills are lower.
Landscaping for Water Conservation
Your yard is part of your home’s footprint. Traditional lawns demand water. They demand chemicals. They offer little ecological value. Consider replacing thirsty turf with native plants. They are adapted to your local climate. They need less water once established. They support local pollinators. Bees and butterflies thrive in native gardens.
Permeable pavers can help too. Concrete drives the water away. It causes runoff. Permeable materials let rain soak into the ground. This recharges aquifers. It reduces strain on city drainage systems. It also keeps your driveway from becoming a slip-and-slide in winter.
Mulch is another simple tool. A thick layer of organic mulch retains moisture. It suppresses weeds. It keeps soil temperatures stable. You water less often. You garden less intensively. It is a labor saver. And it looks good. Dark brown mulch contrasts with green foliage. It defines beds. It looks intentional.
Think about orientation. Plant trees on the south and west sides of your house. They provide shade in summer. They block harsh sun. This reduces your cooling load. In winter, deciduous trees lose their leaves. Sunlight penetrates. It warms your home naturally.

Think of your yard as a living thermostat. It’s not just about curb appeal; proper landscaping can slash your energy bills by acting as a natural climate control system. The Environmental Protection Agency recommends planting deciduous trees on the western and southern exposures of your house. Here is why that matters. In the dead of summer, those leaves create a canopy that blocks infrared radiation. Your home stays cooler. You don’t have to fight the AC as hard.
But when winter hits, the strategy flips. The trees drop their leaves. Suddenly, the sun has a clear path to warm your windows, heating the interior without a dime of electricity. It’s passive heating at its finest.
Stick with native species. They are adapted to your local climate, meaning they survive without constant intervention. This “natural landscaping” approach does double duty. It supports local wildlife and cuts your annual maintenance costs by an average of $700. Less mowing. Less watering. Your wallet breathes easier.
The Tankless Water Heater Debate
We’ve all done the shiver dance on a freezing morning. You turn the handle. Cold water hits your skin. You wait. While you wait, cold water rushes down the drain. You are paying to heat water you aren’t even using yet. Traditional tank heaters keep a massive reservoir of water hot 24/7. That is energy you are burning for nothing.
Enter the tankless water heater.
These units heat water only when you turn on the tap. An electric coil or gas burner engages only for the volume you need. No standby loss. No reheating loops. The math is compelling: reported savings can hit 50 percent on your energy bill. Plus, you gain back floor space. The bulky tank disappears.
Sounds like a no-brainer, right? Maybe not.
There’s a catch. The upfront cost is steep. Installation often requires upgrading gas lines or electrical panels, which adds to the price tag. More importantly, flow rates are limited. If you have a large household where two showers are running simultaneously, you might find the output lukewarm. In winter, the incoming groundwater is colder, so the unit has to work harder to raise the temperature. If your demand spikes, the hot water might run thin. It’s efficient, but it’s not always convenient for every home layout.
Proper Insulation
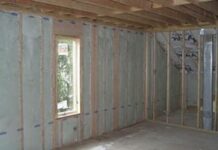
If you want the most bang for your buck, look inside the walls. Insulation is the unsung hero of energy efficiency. It stops heat from escaping in winter and keeping it out in summer. But not all insulation is created equal.
You need to know what you’re dealing with. Common types include fiberglass batts, cellulose, spray foam, and rigid foam boards. Fiberglass is the most common DIY option, but it’s tricky to install correctly. Gaps, compression, or moisture can ruin its effectiveness. Cellulose, made from recycled paper, is great for retrofitting existing walls but requires professional blowing in equipment for best results. Spray foam offers the highest R-value per inch and seals air leaks, but it’s expensive and messy to handle.
Where do you start? Check your attic. Heat rises, and a poorly insulated attic is like leaving the fridge door open. Use a thermal camera or just feel for drafts on a cold day. If you’re doing it yourself, wear a respirator. Fiberglass particles irritate lungs and skin. Safety gear isn’t optional.
How much do you need?

If you are building from the ground up, skipping on insulation is the fastest way to bleed money from your future utility bills. It is likely the single most important green home upgrade you will make. And no, you cannot add it cheaply later. Once the walls are closed up, installing proper insulation becomes a invasive, expensive nightmare. Do it now. While the upfront cost is high, you are paying to keep the energy you are already buying inside the house. Heating and cooling alone make up nearly half of your average home’s energy consumption. Without a solid thermal barrier, that expensive climate control just escapes through the roof or out the windows.
You cannot stop heat transfer entirely. Physics doesn’t work that way. In winter, heat wants to leave. In summer, heat wants to enter. But good insulation slows that process down significantly. It buys you time. It keeps the temperature stable. It reduces the load on your HVAC system. The result is lower bills and a more comfortable home.
Choosing the Right Insulation Type and Installer
The market is flooded with options. Fiberglass. Foam. Cellulose. Each has its pros and cons. Fiberglass is common and relatively affordable but can settle over time. Spray foam creates an excellent air seal but is costlier and requires professional handling. Cellulose is made from recycled paper and is great for retrofitting or dense-pack applications. The material matters, but the installation matters more. A poorly installed R-30 batt is worse than a mediocre R-13 spray foam if the latter actually covers every nook and cranny.
This is where most homeowners slip up. You might pick a cheap contractor to save a few hundred dollars. Bad move. The best installers don’t just throw material into the studs and call it a day. They treat it like a system. After the job is done, they use an infrared camera. Thermal imaging reveals gaps. It shows cold spots where air is leaking. It exposes missed areas behind electrical boxes or around pipes. If your contractor doesn’t offer a thermal scan, find someone who does. You need proof the job was done right.
Sealing the Perimeter
Insulation slows heat flow. Air sealing stops drafts. You need both. Even the best insulation in the world does nothing if cold air is blowing through the cracks around your windows and doors. Upgrade your weather stripping. Check your window sealants. Replace any cracked caulking around the exterior trim. These are small details, but they add up. A tight envelope is more efficient than a loosely insulated one. Think of your house as a thermos. The insulation is the vacuum layer. The weather stripping is the lid. If the lid isn’t on tight, the vacuum doesn’t help.
The Long-Term Gain
Proper insulation and air sealing are not glamorous. They don’t show off on a tour. But they pay you back every month. They reduce the strain on your furnace and AC. They extend the life of those expensive systems. They keep your home comfortable regardless of what is happening outside. It is a boring investment, but it is the most effective one you can make during construction. Don’t cut corners here. The savings are real. The comfort is immediate. And the regret of getting it wrong lasts for decades.
“Proper insulation will ensure that expensive energy that’s heating and